Best comboTop ranked

Hellfire · Cyrus · Oliver

Cavalry #19
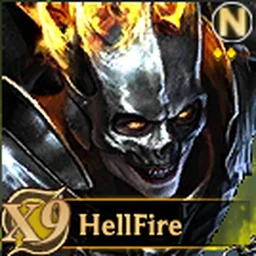
Hellfire Rise of Castles heroHellfire
Cyrus Rise of Castles heroCyrus
Oliver Rise of Castles heroOliver

Hellfire — what the skills grant

Totalled from Hellfire's own skill descriptions. Squad buffs apply to the hero's own squad; legion buffs apply to the whole legion — they stack differently in game, so they are counted separately.

Evasion Rate
+65% hero's squad
Damage
-8% hero's squad
+40% friendly squads
Damage Taken
-35% hero's squad
Resistance
+65% hero's squad
+40% hero's legion
Might
+65% hero's squad
Troop Power Recovery
+270% friendly squads
HP
+15% hero's squad
Counter Effect
-10% friendly squads

About Hellfire

Hellfire is a Cavalry / Archer / Footmen hero in Rise of Castles. On ROCMeta, Hellfire appears in 52 ranked combos spanning Cavalry, Archer, Footmen, and Mixed lineups. Hellfire's highest-ranked appearance is Hellfire · Cyrus · Oliver, which currently sits at Cavalry #19.

Across Hellfire's skills, the hero's own squad gains +65% Evasion Rate, -8% Damage, -35% Damage Taken, +65% Resistance, +65% Might, and +15% HP. The wider legion gains +40% Resistance.

Hellfire is most often ranked alongside Fortuneteller, Saladin, and Rainforest — the heroes that share the most ranked combos with Hellfire. The full list of partners is further down the page.

Why Hellfire ranks where it does

Hellfire is built around evasion and healing — stronger there than 98% of the roster.

Pairs best with Al-Hawra, Cyrus and Saladin. Al-Hawra feeds Hellfire; Hellfire feeds Al-Hawra

Adds little alongside Galahad, Immortal Guardian and Lagertha. both are tanks — the second adds little the first does not

Read from Hellfire's eight skills and compared against every other published hero — not an editorial opinion.

Heroes that pair well with Hellfire

The heroes most often ranked alongside Hellfire.

Best Cavalry combos with Hellfire

Hellfire appears in 16 ranked Cavalry combos.

  1. 19 Hellfire, front rowCyrus, middle rowOliver, back row Hellfire · Cyrus · Oliver
    Hellfire (X09), Cyrus (SP · paid) and Oliver (X24) score 78.91 out of 100 together, and each of the three has a job.

    Hellfire is the shield: the damage reduction and staying power buy the rounds the plan needs — carries 63% of damage reduction across its kit, and takes the front on purpose: this kit feeds on being attacked, and the front is where the attacks are. Cyrus is the multiplier, raising what the other two put out rather than adding a number of its own: carries 54% of damage amplification across its kit, and sits in the middle, where the support reaches both the front and the back. Oliver is the win condition, bringing 88% of the lineup's expected damage: Strike of Light puts 725% into 3 enemy squads every time it fires, and stays in the back, out of the enemy's easy reach, and those range-5 skills lose nothing for it. The lineup works because Cyrus’s Tolerance produces trigger-rate boosts, the exact trigger Hellfire and Oliver both wait on; Hellfire produces combat-skill casts, the exact trigger Cyrus’s Strategy to Victory waits on; Cyrus shuts off enemy recovery, so what Oliver deals stays dealt. What you give up: damage is spread across the enemy line rather than focused on one squad; raw damage reaches only about 40% of the hardest-hitting trio in the roster. How these scores work →

    Current meta 78.91/100 out of 100
  2. 27 Hellfire, front rowSaladin, middle rowLancelot, back row Hellfire · Saladin · Lancelot
    Hellfire (X09), Saladin (SP · paid) and Lancelot (X20 · paid) score 77.84 out of 100 together, and each of the three has a job.

    Hellfire is the shield: the damage reduction and staying power buy the rounds the plan needs — carries 63% of damage reduction across its kit, and takes the front on purpose: this kit feeds on being attacked, and the front is where the attacks are. Saladin is the saboteur, stripping the enemy's stats before the blows land: strips 75% of enemy Might, Resistance and damage in total, and sits in the middle, where the support reaches both the front and the back. Lancelot is the win condition, bringing 71% of the lineup's expected damage: Immortal puts 356% into all enemy squads on a 50% roll, and stays in the back, out of the enemy's easy reach, and those range-5 skills lose nothing for it. The lineup works because Saladin’s Whirlwind Slash produces trigger-rate boosts, the exact trigger Hellfire and Lancelot both wait on; Saladin’s Whirlwind Slash produces prep-skips, the exact trigger Lancelot waits on; Hellfire produces combat-skill casts, the exact trigger Lancelot’s Dedication waits on. What you give up: raw damage reaches only about 17% of the hardest-hitting trio in the roster; a mid-era lineup anchored by Saladin (SP). How these scores work →

    Current meta 77.84/100 out of 100
  3. 46 Hellfire, front rowBjorn, middle rowSaladin, back row Hellfire · Bjorn · Saladin
    Hellfire (X09), Bjorn (X04) and Saladin (SP · paid) score 74.81 out of 100 together, and each of the three has a job.

    Hellfire is the shield: the damage reduction and staying power buy the rounds the plan needs — carries 63% of damage reduction across its kit, and takes the front on purpose: this kit feeds on being attacked, and the front is where the attacks are. Bjorn is the multiplier, raising what the other two put out rather than adding a number of its own: carries 90% of damage amplification across its kit, and sits in the middle, where the support reaches both the front and the back. Saladin is the saboteur, stripping the enemy's stats before the blows land: strips 75% of enemy Might, Resistance and damage in total, and stays in the back, where the range-3 skills still touch the enemy front line. The lineup works because Saladin’s Whirlwind Slash produces trigger-rate boosts, the exact trigger Hellfire and Bjorn both wait on; Bjorn’s Exploit Weakness applies Silence and takes a squad out of the fight, so Saladin swings into a line that cannot answer; Hellfire raises Saladin’s output directly rather than adding a number of its own. What you give up: raw damage reaches only about 8% of the hardest-hitting trio in the roster; Bjorn (X04) is the era weak point -- the enemy will aim at the oldest squad. How these scores work →

    Current meta 74.81/100 out of 100
  4. 55 Hellfire, front rowArmy Breaker, middle rowSaladin, back row Hellfire · Army Breaker · Saladin
    Hellfire (X09), Army Breaker (X02) and Saladin (SP · paid) score 73.14 out of 100 together, and each of the three has a job.

    Hellfire is the shield: the damage reduction and staying power buy the rounds the plan needs — carries 63% of damage reduction across its kit, and takes the front on purpose: this kit feeds on being attacked, and the front is where the attacks are. Army Breaker is the multiplier, raising what the other two put out rather than adding a number of its own: carries 48% of damage amplification across its kit, and sits in the middle, where the support reaches both the front and the back. Saladin is the saboteur, stripping the enemy's stats before the blows land: strips 75% of enemy Might, Resistance and damage in total, and stays in the back, where the range-3 skills still touch the enemy front line. The lineup works because Saladin’s Whirlwind Slash produces trigger-rate boosts, the exact trigger Hellfire and Army Breaker both wait on; Army Breaker’s Formation: Tranquility applies Silence and takes a squad out of the fight, so Saladin swings into a line that cannot answer; Hellfire raises Saladin’s output directly rather than adding a number of its own. What you give up: raw damage reaches only about 5% of the hardest-hitting trio in the roster; Army Breaker (X02) is the era weak point -- the enemy will aim at the oldest squad. How these scores work →

    Current meta 73.14/100 out of 100
  5. 85 Hellfire, front rowThorven, middle rowSundiata, back row Hellfire · Thorven · Sundiata
    Hellfire (X09), Thorven (X29) and Sundiata (X15) score 67.69 out of 100 together, and each of the three has a job.

    Hellfire is the shield: the damage reduction and staying power buy the rounds the plan needs — carries 63% of damage reduction across its kit, and takes the front on purpose: this kit feeds on being attacked, and the front is where the attacks are. Thorven is the multiplier, raising what the other two put out rather than adding a number of its own: carries 180% of damage amplification across its kit, and sits in the middle, where the support reaches both the front and the back. Sundiata is the win condition, bringing 100% of the lineup's expected damage: Flame of Revenge puts 537% into one enemy squad on a 40% roll, and stays in the back, out of the enemy's easy reach, and those range-5 skills lose nothing for it. The lineup works because Hellfire produces combat-skill casts, the exact trigger Thorven’s Spiral Edge waits on; Thorven’s Spiral Edge applies Taunt and takes a squad out of the fight, so Sundiata swings into a line that cannot answer; Hellfire raises Sundiata’s output directly rather than adding a number of its own. What you give up: the trigger chain is thin — the three lean on one link rather than several; raw damage reaches only about 13% of the hardest-hitting trio in the roster. Budget note: every hero in this lineup can be completed without spending. How these scores work →

    Current meta 67.69/100 out of 100
  6. 87 Hellfire, front rowPercival, middle rowThorvi, back row Hellfire · Percival · Thorvi
    Hellfire (X09), Percival (X25) and Thorvi (X29) score 67.58 out of 100 together, and each of the three has a job.

    Hellfire is the shield: the damage reduction and staying power buy the rounds the plan needs — carries 63% of damage reduction across its kit, and takes the front on purpose: this kit feeds on being attacked, and the front is where the attacks are. Percival is the lock: every squad silenced or suppressed is a turn the enemy plan does not happen — Targeted Strike applies Disarm, and sits in the middle, the deepest row those range-2 skills still fire from. Thorvi is the win condition, bringing 69% of the lineup's expected damage: Thunderlance Thrust puts 450% into one enemy squad on a 70% roll, and stays in the back, out of the enemy's easy reach, and those range-5 skills lose nothing for it. The lineup works because Percival’s Targeted Strike applies Disarm and takes a squad out of the fight, so Thorvi swings into a line that cannot answer; Percival shuts off enemy recovery, so what Thorvi deals stays dealt; Hellfire raises Thorvi’s output directly rather than adding a number of its own. What you give up: no hero here feeds another one's trigger; raw damage reaches only about 29% of the hardest-hitting trio in the roster. Budget note: every hero in this lineup can be completed without spending. How these scores work →

    Current meta 67.58/100 out of 100
  7. 88 Hellfire, front rowDon Quixote, middle rowRainforest, back row Hellfire · Don Quixote · Rainforest
    Hellfire (X09), Don Quixote (X22) and Rainforest (X08) score 67.18 out of 100 together, and each of the three has a job.

    Hellfire is the shield: the damage reduction and staying power buy the rounds the plan needs — carries 63% of damage reduction across its kit, and takes the front on purpose: this kit feeds on being attacked, and the front is where the attacks are. Don Quixote is the win condition, bringing 82% of the lineup's expected damage: Parry puts 530% into 3 enemy squads on a 65% roll, and sits in the middle, where the support reaches both the front and the back. Rainforest is the lock: every squad silenced or suppressed is a turn the enemy plan does not happen — Absolute Suppress applies Suppress on a 50% roll, and stays in the back, out of the enemy's easy reach, and those range-5 skills lose nothing for it. The lineup works because Rainforest’s Absolute Suppress applies Suppress and takes a squad out of the fight, so Don Quixote swings into a line that cannot answer; Hellfire raises Don Quixote’s output directly rather than adding a number of its own. What you give up: no hero here feeds another one's trigger; raw damage reaches only about 24% of the hardest-hitting trio in the roster. Budget note: every hero in this lineup can be completed without spending. How these scores work →

    Current meta 67.18/100 out of 100
  8. 92 Hellfire, front rowRainforest, middle rowCaesar, back row Hellfire · Rainforest · Caesar
    Hellfire (X09), Rainforest (X08) and Caesar (SP · paid) score 65.65 out of 100 together, and each of the three has a job.

    Hellfire is the shield: the damage reduction and staying power buy the rounds the plan needs — carries 63% of damage reduction across its kit, and takes the front on purpose: this kit feeds on being attacked, and the front is where the attacks are. Rainforest is the lock: every squad silenced or suppressed is a turn the enemy plan does not happen — Absolute Suppress applies Suppress on a 50% roll, and sits in the middle, where the support reaches both the front and the back. Caesar is the multiplier, raising what the other two put out rather than adding a number of its own: carries 204% of damage amplification across its kit, and stays in the back, out of the enemy's easy reach, and those range-5 skills lose nothing for it. The lineup works because Hellfire produces combat-skill casts, the exact trigger Caesar’s Coalition Strike waits on; Rainforest’s Absolute Suppress applies Suppress and takes a squad out of the fight, so Caesar swings into a line that cannot answer; Hellfire raises Caesar’s output directly rather than adding a number of its own. What you give up: the trigger chain is thin — the three lean on one link rather than several; raw damage reaches only about 18% of the hardest-hitting trio in the roster. How these scores work →

    Current meta 65.65/100 out of 100
  9. 94 Hellfire, front rowEl Cid, middle rowTura Cartel, back row Hellfire · El Cid · Tura Cartel
    Hellfire (X09), El Cid (X12) and Tura Cartel (X21) score 65.60 out of 100 together, and each of the three has a job.

    Hellfire is the shield: the damage reduction and staying power buy the rounds the plan needs — carries 63% of damage reduction across its kit, and takes the front on purpose: this kit feeds on being attacked, and the front is where the attacks are. El Cid brings a second damage line worth 25% of the expected output, so no single silence stops the plan: Sword of Faith puts 500% into one enemy squad on a 80% roll, and sits in the middle, where the support reaches both the front and the back. Tura Cartel is the win condition, bringing 75% of the lineup's expected damage: Serpent's Fang puts 476% x4 into one enemy squad on a 60% roll, and stays in the back, out of the enemy's easy reach, and those range-4 skills lose nothing for it. The lineup works because Tura Cartel shuts off enemy recovery, so what Tura Cartel deals stays dealt; Hellfire raises Tura Cartel’s output directly rather than adding a number of its own. What you give up: no hero here feeds another one's trigger; raw damage reaches only about 24% of the hardest-hitting trio in the roster. Budget note: every hero in this lineup can be completed without spending. How these scores work →

    Current meta 65.60/100 out of 100
  10. 114 Hellfire, front rowPercival, middle rowJohn I, back row Hellfire · Percival · John I
    Hellfire (X09), Percival (X25) and John I (X13) score 62.30 out of 100 together, and each of the three has a job.

    Hellfire is the shield: the damage reduction and staying power buy the rounds the plan needs — carries 63% of damage reduction across its kit, and takes the front on purpose: this kit feeds on being attacked, and the front is where the attacks are. Percival is the lock: every squad silenced or suppressed is a turn the enemy plan does not happen — Targeted Strike applies Disarm, and sits in the middle, the deepest row those range-2 skills still fire from. John I is the win condition, bringing 66% of the lineup's expected damage: Lord of the Sea puts 421% into 2 enemy squads on a 40% roll, and stays in the back, out of the enemy's easy reach, and those range-5 skills lose nothing for it. The lineup works because Percival’s Targeted Strike applies Disarm and takes a squad out of the fight, so John I swings into a line that cannot answer; Percival shuts off enemy recovery, so what John I deals stays dealt; Hellfire raises John I’s output directly rather than adding a number of its own. What you give up: no hero here feeds another one's trigger; damage is spread across the enemy line rather than focused on one squad. Budget note: every hero in this lineup can be completed without spending. How these scores work →

    Current meta 62.30/100 out of 100
  11. 132 Hellfire, front rowNorth's Rage, middle rowWar Lord, back row Hellfire · North's Rage · War Lord
    Hellfire (X09), North's Rage (S00) and War Lord (S03) score 71.34 out of 100 together, and each of the three has a job.

    Hellfire is the shield: the damage reduction and staying power buy the rounds the plan needs — carries 63% of damage reduction across its kit, and takes the front on purpose: this kit feeds on being attacked, and the front is where the attacks are. North's Rage is the lock: every squad silenced or suppressed is a turn the enemy plan does not happen — For the North! applies Suppress on a 30% roll, and sits in the middle, the deepest row those range-2 skills still fire from. War Lord is the multiplier, raising what the other two put out rather than adding a number of its own: carries 45% of damage amplification across its kit, and stays in the back, out of the enemy's easy reach, and those range-5 skills lose nothing for it. The lineup works because War Lord’s War God Descends produces trigger-rate boosts, the exact trigger Hellfire and North's Rage both wait on; War Lord’s War God Descends produces prep-skips, the exact trigger North's Rage waits on; Hellfire raises North's Rage’s output directly rather than adding a number of its own. What you give up: raw damage reaches only about 4% of the hardest-hitting trio in the roster; North's Rage (S00) is the era weak point -- the enemy will aim at the oldest squad. Budget note: every hero in this lineup can be completed without spending. How these scores work →

    Mid progression 71.34/100 out of 100
  12. 144 Hellfire, front rowRainforest, middle rowSundiata, back row Hellfire · Rainforest · Sundiata
    Hellfire (X09), Rainforest (X08) and Sundiata (X15) score 65.71 out of 100 together, and each of the three has a job.

    Hellfire is the shield: the damage reduction and staying power buy the rounds the plan needs — carries 63% of damage reduction across its kit, and takes the front on purpose: this kit feeds on being attacked, and the front is where the attacks are. Rainforest is the lock: every squad silenced or suppressed is a turn the enemy plan does not happen — Absolute Suppress applies Suppress on a 50% roll, and sits in the middle, where the support reaches both the front and the back. Sundiata is the win condition, bringing 75% of the lineup's expected damage: Flame of Revenge puts 537% into one enemy squad on a 40% roll, and stays in the back, out of the enemy's easy reach, and those range-5 skills lose nothing for it. The lineup works because Rainforest’s Absolute Suppress applies Suppress and takes a squad out of the fight, so Sundiata swings into a line that cannot answer; Hellfire raises Sundiata’s output directly rather than adding a number of its own. What you give up: no hero here feeds another one's trigger; raw damage reaches only about 18% of the hardest-hitting trio in the roster. Budget note: every hero in this lineup can be completed without spending. How these scores work →

    Mid progression 65.71/100 out of 100
  13. 148 Hellfire, front rowBjorn, middle rowFarah, back row Hellfire · Bjorn · Farah
    Hellfire (X09), Bjorn (X04) and Farah (X11) score 61.77 out of 100 together, and each of the three has a job.

    Hellfire is the shield: the damage reduction and staying power buy the rounds the plan needs — carries 63% of damage reduction across its kit, and takes the front on purpose: this kit feeds on being attacked, and the front is where the attacks are. Bjorn is the multiplier, raising what the other two put out rather than adding a number of its own: carries 90% of damage amplification across its kit, and sits in the middle, where the support reaches both the front and the back. Farah is the second amplifier -- with two heroes raising the output, the carry hits far above its own numbers: carries 100% of damage amplification across its kit, and stays in the back, out of the enemy's easy reach, and those range-5 skills lose nothing for it. The lineup works because Bjorn’s Exploit Weakness applies Silence and takes a squad out of the fight, so Farah swings into a line that cannot answer; Hellfire raises Farah’s output directly rather than adding a number of its own. What you give up: no hero here feeds another one's trigger; raw damage reaches only about 7% of the hardest-hitting trio in the roster. Budget note: every hero in this lineup can be completed without spending. How these scores work →

    Mid progression 61.77/100 out of 100
  14. 153 Hellfire, front rowBeast Queen, middle rowThe Immortal, back row Hellfire · Beast Queen · The Immortal
    Hellfire (X09), Beast Queen (S02) and The Immortal (S02) score 59.69 out of 100 together, and each of the three has a job.

    Hellfire is the shield: the damage reduction and staying power buy the rounds the plan needs — carries 63% of damage reduction across its kit, and takes the front on purpose: this kit feeds on being attacked, and the front is where the attacks are. Beast Queen is the multiplier, raising what the other two put out rather than adding a number of its own: carries 100% of damage amplification across its kit, and sits in the middle, where the support reaches both the front and the back. The Immortal is the second amplifier -- with two heroes raising the output, the carry hits far above its own numbers: carries 54% of damage amplification across its kit, and stays in the back, out of the enemy's easy reach, and those range-5 skills lose nothing for it. The lineup works because Hellfire raises The Immortal’s output directly rather than adding a number of its own. What you give up: no hero here feeds another one's trigger; raw damage reaches only about 4% of the hardest-hitting trio in the roster. Budget note: every hero in this lineup can be completed without spending. How these scores work →

    Mid progression 59.69/100 out of 100
  15. 155 Hellfire, front rowYukimura Sanada, middle rowMary Tudor, back row Hellfire · Yukimura Sanada · Mary Tudor
    Hellfire (X09), Yukimura Sanada (S00) and Mary Tudor (S00) score 59.35 out of 100 together, and each of the three has a job.

    Hellfire is the shield: the damage reduction and staying power buy the rounds the plan needs — carries 63% of damage reduction across its kit, and takes the front on purpose: this kit feeds on being attacked, and the front is where the attacks are. Yukimura Sanada is the lock: every squad silenced or suppressed is a turn the enemy plan does not happen — Scarlet Armor applies Silence on a 25% roll, and sits in the middle, the deepest row those range-2 skills still fire from. Mary Tudor is the win condition, bringing 69% of the lineup's expected damage: Reign of Sorrow puts 368% into 2 enemy squads on a 50% roll, and stays in the back, out of the enemy's easy reach, and those range-5 skills lose nothing for it. The lineup works because Yukimura Sanada’s Scarlet Armor applies Silence and takes a squad out of the fight, so Mary Tudor swings into a line that cannot answer; Hellfire raises Mary Tudor’s output directly rather than adding a number of its own. What you give up: no hero here feeds another one's trigger; Yukimura Sanada (S00) is the era weak point -- the enemy will aim at the oldest squad. Budget note: every hero in this lineup can be completed without spending. How these scores work →

    Mid progression 59.35/100 out of 100
  16. 165 Hellfire, front rowQueen Anne, middle rowMary Tudor, back row Hellfire · Queen Anne · Mary Tudor
    Hellfire (X09), Queen Anne (S00) and Mary Tudor (S00) score 57.84 out of 100 together, and each of the three has a job.

    Hellfire is the shield: the damage reduction and staying power buy the rounds the plan needs — carries 63% of damage reduction across its kit, and takes the front on purpose: this kit feeds on being attacked, and the front is where the attacks are. Queen Anne is the lock: every squad silenced or suppressed is a turn the enemy plan does not happen — Slaughter applies Suppress on a 30% roll, and sits in the middle, where the support reaches both the front and the back. Mary Tudor is the win condition, bringing 66% of the lineup's expected damage: Reign of Sorrow puts 368% into 2 enemy squads on a 50% roll, and stays in the back, out of the enemy's easy reach, and those range-5 skills lose nothing for it. The lineup works because Queen Anne’s Slaughter applies Suppress and takes a squad out of the fight, so Mary Tudor swings into a line that cannot answer; Hellfire raises Mary Tudor’s output directly rather than adding a number of its own. What you give up: no hero here feeds another one's trigger; Queen Anne (S00) is the era weak point -- the enemy will aim at the oldest squad. Budget note: every hero in this lineup can be completed without spending. How these scores work →

    Mid progression 57.84/100 out of 100

See the full Cavalry rankings →

Best Archer combos with Hellfire

Hellfire appears in 15 ranked Archer combos.

  1. 31 Hellfire, front rowSeraphina, middle rowFrederick I, back row Hellfire · Seraphina · Frederick I
    Hellfire (X09), Seraphina (X28) and Frederick I (X16) score 76.56 out of 100 together, and each of the three has a job.

    Hellfire is the multiplier, raising what the other two put out rather than adding a number of its own: carries 60% of damage amplification across its kit, and takes the front on purpose: this kit feeds on being attacked, and the front is where the attacks are. Seraphina brings a second damage line worth 31% of the expected output, so no single silence stops the plan: Crimson Tide Fire Rain puts 285% into one enemy squad on a 70% roll, and sits in the middle, where the support reaches both the front and the back. Frederick I is the win condition, bringing 69% of the lineup's expected damage: Eagle on Fire puts 365% into 2 enemy squads on a 70% roll, and stays in the back, out of the enemy's easy reach, and those range-5 skills lose nothing for it. The lineup works because Seraphina’s Crimson Tide Fire Rain produces burns, the exact trigger Frederick I’s Frenzy War waits on; Frederick I’s Eagle on Fire produces burns, the exact trigger Seraphina’s Crimson Tide Fire Rain waits on; Hellfire produces combat-skill casts, the exact trigger Frederick I’s Frenzy War waits on. What you give up: raw damage reaches only about 34% of the hardest-hitting trio in the roster; damage is spread across the enemy line rather than focused on one squad. Budget note: every hero in this lineup can be completed without spending. How these scores work →

    Current meta 76.56/100 out of 100
  2. 43 Hellfire, front rowHelsingen, middle rowNicolas Flamel, back row Hellfire · Helsingen · Nicolas Flamel
    Hellfire (X09), Helsingen (X28) and Nicolas Flamel (X18) score 75.17 out of 100 together, and each of the three has a job.

    Hellfire is the multiplier, raising what the other two put out rather than adding a number of its own: carries 60% of damage amplification across its kit, and takes the front on purpose: this kit feeds on being attacked, and the front is where the attacks are. Helsingen brings a second damage line worth 34% of the expected output, so no single silence stops the plan: Nightshadow Scorching Arrow puts 285% into one enemy squad on a 70% roll, and sits in the middle, where the support reaches both the front and the back. Nicolas Flamel is the win condition, bringing 66% of the lineup's expected damage: Shadow of Star puts 220% x3 into one enemy squad on a 55% roll, and stays in the back, out of the enemy's easy reach, and those range-4 skills lose nothing for it. The lineup works because Helsingen’s Nightshadow Scorching Arrow produces burns, the exact trigger Nicolas Flamel’s Eternal Flame waits on; Nicolas Flamel’s Alchemical Trick produces burns, the exact trigger Helsingen’s Nightshadow Scorching Arrow waits on; Hellfire raises Nicolas Flamel’s output directly rather than adding a number of its own. What you give up: damage is spread across the enemy line rather than focused on one squad; raw damage reaches only about 29% of the hardest-hitting trio in the roster. Budget note: every hero in this lineup can be completed without spending. How these scores work →

    Current meta 75.17/100 out of 100
  3. 44 Hellfire, front rowSeraphina, middle rowNicolas Flamel, back row Hellfire · Seraphina · Nicolas Flamel
    Hellfire (X09), Seraphina (X28) and Nicolas Flamel (X18) score 75.09 out of 100 together, and each of the three has a job.

    Hellfire is the multiplier, raising what the other two put out rather than adding a number of its own: carries 60% of damage amplification across its kit, and takes the front on purpose: this kit feeds on being attacked, and the front is where the attacks are. Seraphina brings a second damage line worth 36% of the expected output, so no single silence stops the plan: Crimson Tide Fire Rain puts 285% into one enemy squad on a 70% roll, and sits in the middle, where the support reaches both the front and the back. Nicolas Flamel is the win condition, bringing 64% of the lineup's expected damage: Shadow of Star puts 220% x3 into one enemy squad on a 55% roll, and stays in the back, out of the enemy's easy reach, and those range-4 skills lose nothing for it. The lineup works because Seraphina’s Crimson Tide Fire Rain produces burns, the exact trigger Nicolas Flamel’s Eternal Flame waits on; Nicolas Flamel’s Alchemical Trick produces burns, the exact trigger Seraphina’s Crimson Tide Fire Rain waits on; Seraphina’s Crimson Tide Fire Rain applies Silence and takes a squad out of the fight, so Nicolas Flamel swings into a line that cannot answer. What you give up: damage is spread across the enemy line rather than focused on one squad; raw damage reaches only about 30% of the hardest-hitting trio in the roster. Budget note: every hero in this lineup can be completed without spending. How these scores work →

    Current meta 75.09/100 out of 100
  4. 71 Henry V, front rowHellfire, middle rowWarden, back row Henry V · Hellfire · Warden
    Henry V (X17), Hellfire (X09) and Warden (X06) score 72.18 out of 100 together, and each of the three has a job.

    Henry V is the lifeline: that healing decides whether this lineup is still standing in round five — carries 408% of recovery across its kit, and takes the front on purpose: this kit feeds on being attacked, and the front is where the attacks are. Hellfire is the multiplier, raising what the other two put out rather than adding a number of its own: carries 60% of damage amplification across its kit, and sits in the middle, where the support reaches both the front and the back. Warden is the shield: the damage reduction and staying power buy the rounds the plan needs — carries 116% of damage reduction across its kit, and stays in the back, out of the enemy's easy reach, and those range-5 skills lose nothing for it. The lineup works because Warden’s Aspect of the Eagle produces trigger-rate boosts, the exact trigger Henry V and Hellfire both wait on; Hellfire raises Henry V’s output directly rather than adding a number of its own. What you give up: raw damage reaches only about 9% of the hardest-hitting trio in the roster; Warden (X06) is the era weak point -- the enemy will aim at the oldest squad. Budget note: every hero in this lineup can be completed without spending. How these scores work →

    Current meta 72.18/100 out of 100
  5. 74 Hellfire, front rowHelsingen, middle rowSeraphina, back row Hellfire · Helsingen · Seraphina
    Hellfire (X09), Helsingen (X28) and Seraphina (X28) score 71.71 out of 100 together, and each of the three has a job.

    Hellfire is the multiplier, raising what the other two put out rather than adding a number of its own: carries 60% of damage amplification across its kit, and takes the front on purpose: this kit feeds on being attacked, and the front is where the attacks are. Helsingen brings a second damage line worth 49% of the expected output, so no single silence stops the plan: Nightshadow Scorching Arrow puts 285% into one enemy squad on a 70% roll, and sits in the middle, where the support reaches both the front and the back. Seraphina is the win condition, bringing 51% of the lineup's expected damage: Crimson Tide Fire Rain puts 285% into one enemy squad on a 70% roll, and stays in the back, out of the enemy's easy reach, and those range-5 skills lose nothing for it. The lineup works because Seraphina’s Firearm Brand produces mark, the exact trigger Helsingen’s Dark Crossbow Brand waits on; Helsingen’s Dark Crossbow Brand produces mark, the exact trigger Seraphina’s Firearm Brand waits on; Seraphina’s Crimson Tide Fire Rain produces burns, the exact trigger Helsingen’s Nightshadow Scorching Arrow waits on. What you give up: damage is spread across the enemy line rather than focused on one squad; raw damage reaches only about 21% of the hardest-hitting trio in the roster. Budget note: every hero in this lineup can be completed without spending. How these scores work →

    Current meta 71.71/100 out of 100
  6. 80 Henry V, front rowHellfire, middle rowAl-Hawra, back row Henry V · Hellfire · Al-Hawra
    Henry V (X17), Hellfire (X09) and Al-Hawra (X01 · paid) score 70.99 out of 100 together, and each of the three has a job.

    Henry V is the lifeline: that healing decides whether this lineup is still standing in round five — carries 408% of recovery across its kit, and takes the front on purpose: this kit feeds on being attacked, and the front is where the attacks are. Hellfire is the multiplier, raising what the other two put out rather than adding a number of its own: carries 60% of damage amplification across its kit, and sits in the middle, where the support reaches both the front and the back. Al-Hawra is the second amplifier -- with two heroes raising the output, the carry hits far above its own numbers: carries 78% of damage amplification across its kit, and stays in the back, out of the enemy's easy reach, and those range-5 skills lose nothing for it. The lineup works because Al-Hawra’s Desert Phantom produces trigger-rate boosts, the exact trigger Henry V and Hellfire both wait on; Henry V produces combat-skill casts, the exact trigger Al-Hawra’s Desert Phantom waits on; Hellfire raises Henry V’s output directly rather than adding a number of its own. What you give up: raw damage reaches only about 9% of the hardest-hitting trio in the roster; Al-Hawra (X01) is the era weak point -- the enemy will aim at the oldest squad. How these scores work →

    Current meta 70.99/100 out of 100
  7. 97 Hellfire, front rowJulian, middle rowSpectral Reaper, back row Hellfire · Julian · Spectral Reaper
    Hellfire (X09), Julian (X25) and Spectral Reaper (X03) score 69.30 out of 100 together, and each of the three has a job.

    Hellfire is the multiplier, raising what the other two put out rather than adding a number of its own: carries 60% of damage amplification across its kit, and takes the front on purpose: this kit feeds on being attacked, and the front is where the attacks are. Julian is the second amplifier -- with two heroes raising the output, the carry hits far above its own numbers: carries 5% of damage amplification across its kit, and sits in the middle, where the support reaches both the front and the back. Spectral Reaper is the win condition, bringing 100% of the lineup's expected damage: Tamashi-kusari puts 742% into one enemy squad on a 35% roll, and stays in the back, out of the enemy's easy reach, and those range-4 skills lose nothing for it. The lineup works because Julian’s Oath of Domionion produces extra basic attacks, the exact trigger Spectral Reaper waits on; Spectral Reaper shuts off enemy recovery, so what Spectral Reaper deals stays dealt; Hellfire raises Spectral Reaper’s output directly rather than adding a number of its own. What you give up: raw damage reaches only about 7% of the hardest-hitting trio in the roster; Spectral Reaper (X03) is the era weak point -- the enemy will aim at the oldest squad. Budget note: every hero in this lineup can be completed without spending. How these scores work →

    Current meta 69.30/100 out of 100
  8. 100 Hellfire, front rowPenthesilea, middle rowSpectral Reaper, back row Hellfire · Penthesilea · Spectral Reaper
    Hellfire (X09), Penthesilea (SP · paid) and Spectral Reaper (X03) score 69.01 out of 100 together, and each of the three has a job.

    Hellfire is the multiplier, raising what the other two put out rather than adding a number of its own: carries 60% of damage amplification across its kit, and takes the front on purpose: this kit feeds on being attacked, and the front is where the attacks are. Penthesilea is the second amplifier -- with two heroes raising the output, the carry hits far above its own numbers: carries 103% of damage amplification across its kit, and sits in the middle, where the support reaches both the front and the back. Spectral Reaper is the win condition, bringing 95% of the lineup's expected damage: Tamashi-kusari puts 742% into one enemy squad on a 35% roll, and stays in the back, out of the enemy's easy reach, and those range-4 skills lose nothing for it. The lineup works because Penthesilea’s Twin Fates produces extra basic attacks, the exact trigger Spectral Reaper waits on; Penthesilea’s Hunting Domain applies Disarm and takes a squad out of the fight, so Spectral Reaper swings into a line that cannot answer; Spectral Reaper shuts off enemy recovery, so what Spectral Reaper deals stays dealt. What you give up: raw damage reaches only about 7% of the hardest-hitting trio in the roster; Spectral Reaper (X03) is the era weak point -- the enemy will aim at the oldest squad. How these scores work →

    Current meta 69.01/100 out of 100
  9. 111 Hellfire, front rowEidolon, middle rowHenry II, back row Hellfire · Eidolon · Henry II
    Hellfire (X09), Eidolon (X07) and Henry II (X20) score 66.25 out of 100 together, and each of the three has a job.

    Hellfire is the multiplier, raising what the other two put out rather than adding a number of its own: carries 60% of damage amplification across its kit, and takes the front on purpose: this kit feeds on being attacked, and the front is where the attacks are. Eidolon is the second amplifier -- with two heroes raising the output, the carry hits far above its own numbers: carries 140% of damage amplification across its kit, and sits in the middle, where the support reaches both the front and the back. Henry II is the win condition, bringing 89% of the lineup's expected damage: Spear of the Dynasty puts 260% x4 into one enemy squad every time it fires, and stays in the back, out of the enemy's easy reach, and those range-5 skills lose nothing for it. The lineup works because Hellfire raises Henry II’s output directly rather than adding a number of its own. What you give up: no hero here feeds another one's trigger; raw damage reaches only about 32% of the hardest-hitting trio in the roster. Budget note: every hero in this lineup can be completed without spending. How these scores work →

    Current meta 66.25/100 out of 100
  10. 133 Hellfire, front rowWarden, middle rowSpectral Reaper, back row Hellfire · Warden · Spectral Reaper
    Hellfire (X09), Warden (X06) and Spectral Reaper (X03) score 74.27 out of 100 together, and each of the three has a job.

    Hellfire is the multiplier, raising what the other two put out rather than adding a number of its own: carries 60% of damage amplification across its kit, and takes the front on purpose: this kit feeds on being attacked, and the front is where the attacks are. Warden is the shield: the damage reduction and staying power buy the rounds the plan needs — carries 116% of damage reduction across its kit, and sits in the middle, where the support reaches both the front and the back. Spectral Reaper is the win condition, bringing 79% of the lineup's expected damage: Tamashi-kusari puts 742% into one enemy squad on a 35% roll, and stays in the back, out of the enemy's easy reach, and those range-4 skills lose nothing for it. The lineup works because Warden’s Aspect of the Eagle produces trigger-rate boosts, the exact trigger Hellfire and Spectral Reaper both wait on; Warden’s Aspect of the Tiger produces extra basic attacks, the exact trigger Spectral Reaper waits on; Spectral Reaper shuts off enemy recovery, so what Spectral Reaper deals stays dealt. What you give up: raw damage reaches only about 9% of the hardest-hitting trio in the roster; Spectral Reaper (X03) is the era weak point -- the enemy will aim at the oldest squad. Budget note: every hero in this lineup can be completed without spending. How these scores work →

    Mid progression 74.27/100 out of 100
  11. 141 Hellfire, front rowPoison Master, middle rowBelisarius, back row Hellfire · Poison Master · Belisarius
    Hellfire (X09), Poison Master (X10) and Belisarius (X12) score 70.95 out of 100 together, and each of the three has a job.

    Hellfire is the multiplier, raising what the other two put out rather than adding a number of its own: carries 60% of damage amplification across its kit, and takes the front on purpose: this kit feeds on being attacked, and the front is where the attacks are. Poison Master is the lock: every squad silenced or suppressed is a turn the enemy plan does not happen — Deadly Virus applies Suppress on a 50% roll, and sits in the middle, where the support reaches both the front and the back. Belisarius is the win condition, bringing 100% of the lineup's expected damage: Hunting Down puts 279% into all enemy squads on a 70% roll, and stays in the back, out of the enemy's easy reach, and those range-5 skills lose nothing for it. The lineup works because Poison Master’s Spreading Poison produces dot, the exact trigger Belisarius’s Hunting Down waits on; Hellfire produces combat-skill casts, the exact trigger Poison Master’s Spreading Poison waits on; Poison Master’s Deadly Virus applies Suppress and takes a squad out of the fight, so Belisarius swings into a line that cannot answer. What you give up: raw damage reaches only about 8% of the hardest-hitting trio in the roster; a mid-era lineup anchored by Belisarius (X12). Budget note: every hero in this lineup can be completed without spending. How these scores work →

    Mid progression 70.95/100 out of 100
  12. 148 Hellfire, front rowRough Rider, middle rowAl-Hawra, back row Hellfire · Rough Rider · Al-Hawra
    Hellfire (X09), Rough Rider (S00) and Al-Hawra (X01 · paid) score 69.37 out of 100 together, and each of the three has a job.

    Hellfire is the multiplier, raising what the other two put out rather than adding a number of its own: carries 60% of damage amplification across its kit, and takes the front on purpose: this kit feeds on being attacked, and the front is where the attacks are. Rough Rider is the flex piece -- modest alone, but covering what the other two leave open: Guerilla Warfae puts 634% into one enemy squad on a 55% roll, and sits in the middle, the deepest row those range-2 skills still fire from. Al-Hawra is the second amplifier -- with two heroes raising the output, the carry hits far above its own numbers: carries 78% of damage amplification across its kit, and stays in the back, out of the enemy's easy reach, and those range-5 skills lose nothing for it. The lineup works because Al-Hawra’s Desert Phantom produces trigger-rate boosts, the exact trigger Hellfire and Rough Rider both wait on; Hellfire produces combat-skill casts, the exact trigger Al-Hawra’s Desert Phantom waits on; Hellfire raises Rough Rider’s output directly rather than adding a number of its own. What you give up: raw damage reaches only about 6% of the hardest-hitting trio in the roster; Rough Rider (S00) is the era weak point -- the enemy will aim at the oldest squad. How these scores work →

    Mid progression 69.37/100 out of 100
  13. 151 Hellfire, front rowBelisarius, middle rowDarius, back row Hellfire · Belisarius · Darius
    Hellfire (X09), Belisarius (X12) and Darius (X13) score 68.28 out of 100 together, and each of the three has a job.

    Hellfire is the multiplier, raising what the other two put out rather than adding a number of its own: carries 60% of damage amplification across its kit, and takes the front on purpose: this kit feeds on being attacked, and the front is where the attacks are. Belisarius brings a second damage line worth 43% of the expected output, so no single silence stops the plan: Hunting Down puts 279% into all enemy squads on a 70% roll, and sits in the middle, where the support reaches both the front and the back. Darius is the win condition, bringing 57% of the lineup's expected damage: Disdain puts 332% into 2 enemy squads on a 40% roll, and stays in the back, where the range-3 skills still touch the enemy front line. The lineup works because Darius’s Disdain produces dot, the exact trigger Belisarius’s Hunting Down waits on; Belisarius’s Ripping Apart produces dot, the exact trigger Darius’s King of all Kings waits on; Hellfire raises Darius’s output directly rather than adding a number of its own. What you give up: little here disrupts the enemy plan, so the fight is decided on raw output; raw damage reaches only about 19% of the hardest-hitting trio in the roster. Budget note: every hero in this lineup can be completed without spending. How these scores work →

    Mid progression 68.28/100 out of 100
  14. 165 Hellfire, front rowSakura Blossom, middle rowBoudica, back row Hellfire · Sakura Blossom · Boudica
    Hellfire (X09), Sakura Blossom (X01) and Boudica (X01 · paid) score 62.34 out of 100 together, and each of the three has a job.

    Hellfire is the multiplier, raising what the other two put out rather than adding a number of its own: carries 60% of damage amplification across its kit, and takes the front on purpose: this kit feeds on being attacked, and the front is where the attacks are. Sakura Blossom is the second amplifier -- with two heroes raising the output, the carry hits far above its own numbers: carries 70% of damage amplification across its kit, and sits in the middle, where the support reaches both the front and the back. Boudica is the win condition, bringing 75% of the lineup's expected damage: Celtic Alliance puts 200% x3 into one enemy squad on a 70% roll, and stays in the back, where the range-3 skills still touch the enemy front line. The lineup works because Sakura Blossom’s Senbon Sakura produces tempo, the exact trigger Boudica’s Song of Uprising waits on; Hellfire raises Boudica’s output directly rather than adding a number of its own. What you give up: raw damage reaches only about 8% of the hardest-hitting trio in the roster; Sakura Blossom (X01) is the era weak point -- the enemy will aim at the oldest squad. How these scores work →

    Mid progression 62.34/100 out of 100
  15. 174 Hellfire, front rowEidolon, middle rowEdward the Confessor, back row Hellfire · Eidolon · Edward the Confessor
    Hellfire (X09), Eidolon (X07) and Edward the Confessor (S01) score 59.99 out of 100 together, and each of the three has a job.

    Hellfire is the multiplier, raising what the other two put out rather than adding a number of its own: carries 60% of damage amplification across its kit, and takes the front on purpose: this kit feeds on being attacked, and the front is where the attacks are. Eidolon is the second amplifier -- with two heroes raising the output, the carry hits far above its own numbers: carries 140% of damage amplification across its kit, and sits in the middle, where the support reaches both the front and the back. Edward the Confessor is the lock: every squad silenced or suppressed is a turn the enemy plan does not happen — King's Crossbow applies Suppress on a 35% roll, and stays in the back, where the range-3 skills still touch the enemy front line. The lineup works because Edward the Confessor’s King's Crossbow applies Suppress and takes a squad out of the fight, so Eidolon swings into a line that cannot answer; Hellfire raises Eidolon’s output directly rather than adding a number of its own. What you give up: no hero here feeds another one's trigger; raw damage reaches only about 5% of the hardest-hitting trio in the roster. Budget note: every hero in this lineup can be completed without spending. How these scores work →

    Mid progression 59.99/100 out of 100

See the full Archer rankings →

Best Footmen combos with Hellfire

Hellfire appears in 16 ranked Footmen combos.

  1. 39 Hannibal, front rowChen Liu, middle rowHellfire, back row Hannibal · Chen Liu · Hellfire
    Hannibal (X28 · paid), Chen Liu (X01) and Hellfire (X09) score 71.26 out of 100 together, and each of the three has a job.

    Hannibal is the lock: every squad silenced or suppressed is a turn the enemy plan does not happen — Rear Escort applies Disarm, and takes the front to pull enemy attacks inward -- exactly where that belongs. Chen Liu is the multiplier, raising what the other two put out rather than adding a number of its own: carries 190% of damage amplification across its kit, and sits in the middle, the deepest row those range-2 skills still fire from. Hellfire is the second amplifier -- with two heroes raising the output, the carry hits far above its own numbers: carries 60% of damage amplification across its kit, and stays in the back, out of the enemy's easy reach, and those range-5 skills lose nothing for it. The lineup works because Hannibal’s Dual Strike produces extra basic attacks, the exact trigger Chen Liu waits on; Chen Liu produces follow-up attacks, the exact trigger Hannibal’s Dual Strike waits on; Hannibal’s Rear Escort applies Disarm and takes a squad out of the fight, so Chen Liu swings into a line that cannot answer. What you give up: raw damage reaches only about 4% of the hardest-hitting trio in the roster; Chen Liu (X01) is the era weak point -- the enemy will aim at the oldest squad. How these scores work →

    Current meta 71.26/100 out of 100
  2. 74 Hellfire, front rowGeraint, middle rowHarald III, back row Hellfire · Geraint · Harald III
    Hellfire (X09), Geraint (X24) and Harald III (X19) score 65.34 out of 100 together, and each of the three has a job.

    Hellfire is the multiplier, raising what the other two put out rather than adding a number of its own: carries 60% of damage amplification across its kit, and takes the front on purpose: this kit feeds on being attacked, and the front is where the attacks are. Geraint is the lock: every squad silenced or suppressed is a turn the enemy plan does not happen — strips 18% of enemy Might, Resistance and damage in total, and sits in the middle, where the support reaches both the front and the back. Harald III adds a second source of control, so the lock rarely has an off round: Absolute Authority applies Taunt on a 55% roll, and stays in the back, out of the enemy's easy reach, and those range-5 skills lose nothing for it. The lineup works because Hellfire produces combat-skill casts, the exact trigger Geraint’s Deadly Roar waits on; Hellfire raises Harald III’s output directly rather than adding a number of its own. What you give up: raw damage reaches only about 13% of the hardest-hitting trio in the roster; the trigger chain is thin — the three lean on one link rather than several. Budget note: every hero in this lineup can be completed without spending. How these scores work →

    Current meta 65.34/100 out of 100
  3. 84 Hellfire, front rowAlberich, middle rowFortuneteller, back row Hellfire · Alberich · Fortuneteller
    Hellfire (X09), Alberich (X18 · paid) and Fortuneteller (X08) score 64.17 out of 100 together, and each of the three has a job.

    Hellfire is the multiplier, raising what the other two put out rather than adding a number of its own: carries 60% of damage amplification across its kit, and takes the front on purpose: this kit feeds on being attacked, and the front is where the attacks are. Alberich is the saboteur, stripping the enemy's stats before the blows land: strips 27% of enemy Might, Resistance and damage in total, and sits in the middle, where the support reaches both the front and the back. Fortuneteller is the lock: every squad silenced or suppressed is a turn the enemy plan does not happen — Soul Sacrifice applies Suppress, and stays in the back, out of the enemy's easy reach, and those range-5 skills lose nothing for it. The lineup works because Hellfire produces combat-skill casts, the exact trigger Alberich’s Treasure Holder and Fortuneteller’s Soul Sacrifice both wait on; Hellfire raises Fortuneteller’s output directly rather than adding a number of its own. What you give up: raw damage reaches only about 15% of the hardest-hitting trio in the roster; the trigger chain is thin — the three lean on one link rather than several. How these scores work →

    Current meta 64.17/100 out of 100
  4. 88 Hellfire, front rowHealer, middle rowGustav, back row Hellfire · Healer · Gustav
    Hellfire (X09), Healer (X10) and Gustav (X20) score 63.51 out of 100 together, and each of the three has a job.

    Hellfire is the multiplier, raising what the other two put out rather than adding a number of its own: carries 60% of damage amplification across its kit, and takes the front on purpose: this kit feeds on being attacked, and the front is where the attacks are. Healer is the second amplifier -- with two heroes raising the output, the carry hits far above its own numbers: carries 20% of damage amplification across its kit, and sits in the middle, the deepest row those range-2 skills still fire from. Gustav is the lock: every squad silenced or suppressed is a turn the enemy plan does not happen — Uprising applies Suppress, and stays in the back, out of the enemy's easy reach, and those range-5 skills lose nothing for it. The lineup works because Hellfire raises Gustav’s output directly rather than adding a number of its own. What you give up: no hero here feeds another one's trigger; raw damage reaches only about 2% of the hardest-hitting trio in the roster. Budget note: every hero in this lineup can be completed without spending. How these scores work →

    Current meta 63.51/100 out of 100
  5. 89 Hellfire, front rowHealer, middle rowHarald III, back row Hellfire · Healer · Harald III
    Hellfire (X09), Healer (X10) and Harald III (X19) score 63.43 out of 100 together, and each of the three has a job.

    Hellfire is the multiplier, raising what the other two put out rather than adding a number of its own: carries 60% of damage amplification across its kit, and takes the front on purpose: this kit feeds on being attacked, and the front is where the attacks are. Healer is the second amplifier -- with two heroes raising the output, the carry hits far above its own numbers: carries 20% of damage amplification across its kit, and sits in the middle, the deepest row those range-2 skills still fire from. Harald III is the lock: every squad silenced or suppressed is a turn the enemy plan does not happen — Absolute Authority applies Taunt on a 55% roll, and stays in the back, out of the enemy's easy reach, and those range-5 skills lose nothing for it. The lineup works because Hellfire raises Harald III’s output directly rather than adding a number of its own. What you give up: no hero here feeds another one's trigger; raw damage reaches only about 10% of the hardest-hitting trio in the roster. Budget note: every hero in this lineup can be completed without spending. How these scores work →

    Current meta 63.43/100 out of 100
  6. 90 Hellfire, front rowGeraint, middle rowRagnar, back row Hellfire · Geraint · Ragnar
    Hellfire (X09), Geraint (X24) and Ragnar (X12 · paid) score 63.38 out of 100 together, and each of the three has a job.

    Hellfire is the multiplier, raising what the other two put out rather than adding a number of its own: carries 60% of damage amplification across its kit, and takes the front on purpose: this kit feeds on being attacked, and the front is where the attacks are. Geraint is the lock: every squad silenced or suppressed is a turn the enemy plan does not happen — strips 18% of enemy Might, Resistance and damage in total, and sits in the middle, where the support reaches both the front and the back. Ragnar is the win condition, bringing 69% of the lineup's expected damage: Pillage puts 640% into all enemy squads every time it fires, and stays in the back, out of the enemy's easy reach, and those range-5 skills lose nothing for it. The lineup works because Hellfire produces combat-skill casts, the exact trigger Geraint’s Deadly Roar waits on; Hellfire raises Ragnar’s output directly rather than adding a number of its own. What you give up: damage is spread across the enemy line rather than focused on one squad; raw damage reaches only about 12% of the hardest-hitting trio in the roster. How these scores work →

    Current meta 63.38/100 out of 100
  7. 93 Hellfire, front rowFortuneteller, middle rowKing Cnut, back row Hellfire · Fortuneteller · King Cnut
    Hellfire (X09), Fortuneteller (X08) and King Cnut (X17) score 63.05 out of 100 together, and each of the three has a job.

    Hellfire is the multiplier, raising what the other two put out rather than adding a number of its own: carries 60% of damage amplification across its kit, and takes the front on purpose: this kit feeds on being attacked, and the front is where the attacks are. Fortuneteller is the lock: every squad silenced or suppressed is a turn the enemy plan does not happen — Soul Sacrifice applies Suppress, and sits in the middle, where the support reaches both the front and the back. King Cnut is the second amplifier -- with two heroes raising the output, the carry hits far above its own numbers: carries 60% of damage amplification across its kit, and stays in the back, out of the enemy's easy reach, and those range-5 skills lose nothing for it. The lineup works because Hellfire produces combat-skill casts, the exact trigger Fortuneteller’s Soul Sacrifice waits on; King Cnut’s Frenzy Tides applies Suppress and takes a squad out of the fight, so Fortuneteller swings into a line that cannot answer; Hellfire raises Fortuneteller’s output directly rather than adding a number of its own. What you give up: damage is spread across the enemy line rather than focused on one squad; raw damage reaches only about 14% of the hardest-hitting trio in the roster. Budget note: every hero in this lineup can be completed without spending. How these scores work →

    Current meta 63.05/100 out of 100
  8. 99 Hellfire, front rowHealer, middle rowLa Hire, back row Hellfire · Healer · La Hire
    Hellfire (X09), Healer (X10) and La Hire (X22) score 62.39 out of 100 together, and each of the three has a job.

    Hellfire is the multiplier, raising what the other two put out rather than adding a number of its own: carries 60% of damage amplification across its kit, and takes the front on purpose: this kit feeds on being attacked, and the front is where the attacks are. Healer is the second amplifier -- with two heroes raising the output, the carry hits far above its own numbers: carries 20% of damage amplification across its kit, and sits in the middle, the deepest row those range-2 skills still fire from. La Hire is the win condition, bringing 100% of the lineup's expected damage: Shield Breaker puts 325% into 2 enemy squads on a 60% roll, and stays in the back, out of the enemy's easy reach, and those range-4 skills lose nothing for it. The lineup works because Hellfire raises La Hire’s output directly rather than adding a number of its own. What you give up: no hero here feeds another one's trigger; raw damage reaches only about 7% of the hardest-hitting trio in the roster. Budget note: every hero in this lineup can be completed without spending. How these scores work →

    Current meta 62.39/100 out of 100
  9. 112 Hellfire, front rowFortuneteller, middle rowNevsky, back row Hellfire · Fortuneteller · Nevsky
    Hellfire (X09), Fortuneteller (X08) and Nevsky (X27) score 60.30 out of 100 together, and each of the three has a job.

    Hellfire is the multiplier, raising what the other two put out rather than adding a number of its own: carries 60% of damage amplification across its kit, and takes the front on purpose: this kit feeds on being attacked, and the front is where the attacks are. Fortuneteller is the lock: every squad silenced or suppressed is a turn the enemy plan does not happen — Soul Sacrifice applies Suppress, and sits in the middle, where the support reaches both the front and the back. Nevsky is the win condition, bringing 60% of the lineup's expected damage: Tactical Strike puts 320% x2 into 2 enemy squads on a 60% roll, and stays in the back, out of the enemy's easy reach, and those range-5 skills lose nothing for it. The lineup works because Hellfire produces combat-skill casts, the exact trigger Fortuneteller’s Soul Sacrifice and Nevsky’s Battle Skill Echo both wait on; Fortuneteller’s Soul Sacrifice applies Suppress and takes a squad out of the fight, so Nevsky swings into a line that cannot answer; Hellfire raises Nevsky’s output directly rather than adding a number of its own. What you give up: raw damage reaches only about 27% of the hardest-hitting trio in the roster; the trigger chain is thin — the three lean on one link rather than several. Budget note: every hero in this lineup can be completed without spending. How these scores work →

    Current meta 60.30/100 out of 100
  10. 113 Hellfire, front rowDach Tengri, middle rowHarald III, back row Hellfire · Dach Tengri · Harald III
    Hellfire (X09), Dach Tengri (X02) and Harald III (X19) score 60.14 out of 100 together, and each of the three has a job.

    Hellfire is the multiplier, raising what the other two put out rather than adding a number of its own: carries 60% of damage amplification across its kit, and takes the front on purpose: this kit feeds on being attacked, and the front is where the attacks are. Dach Tengri is the second amplifier -- with two heroes raising the output, the carry hits far above its own numbers: carries 32% of damage amplification across its kit, and sits in the middle, where the support reaches both the front and the back. Harald III is the lock: every squad silenced or suppressed is a turn the enemy plan does not happen — Absolute Authority applies Taunt on a 55% roll, and stays in the back, out of the enemy's easy reach, and those range-5 skills lose nothing for it. The lineup works because Hellfire raises Harald III’s output directly rather than adding a number of its own. What you give up: no hero here feeds another one's trigger; raw damage reaches only about 10% of the hardest-hitting trio in the roster. Budget note: every hero in this lineup can be completed without spending. How these scores work →

    Current meta 60.14/100 out of 100
  11. 132 Hellfire, front rowClovis I, middle rowScarlet Reaver, back row Hellfire · Clovis I · Scarlet Reaver
    Hellfire (X09), Clovis I (X15) and Scarlet Reaver (X07) score 67.99 out of 100 together, and each of the three has a job.

    Hellfire is the multiplier, raising what the other two put out rather than adding a number of its own: carries 60% of damage amplification across its kit, and takes the front on purpose: this kit feeds on being attacked, and the front is where the attacks are. Clovis I is the lock: every squad silenced or suppressed is a turn the enemy plan does not happen — Territory Expansion applies Silence on a 60% roll, and sits in the middle, where the support reaches both the front and the back. Scarlet Reaver is the second amplifier -- with two heroes raising the output, the carry hits far above its own numbers: carries 70% of damage amplification across its kit, and stays in the back, out of the enemy's easy reach, and those range-5 skills lose nothing for it. The lineup works because Hellfire produces combat-skill casts, the exact trigger Clovis I’s Frankish Spear waits on; Clovis I’s Territory Expansion applies Silence and takes a squad out of the fight, so Scarlet Reaver swings into a line that cannot answer; Hellfire raises Scarlet Reaver’s output directly rather than adding a number of its own. What you give up: the trigger chain is thin — the three lean on one link rather than several; raw damage reaches only about 22% of the hardest-hitting trio in the roster. Budget note: every hero in this lineup can be completed without spending. How these scores work →

    Mid progression 67.99/100 out of 100
  12. 134 Hellfire, front rowPepin, middle rowClovis I, back row Hellfire · Pepin · Clovis I
    Hellfire (X09), Pepin (X12) and Clovis I (X15) score 67.44 out of 100 together, and each of the three has a job.

    Hellfire is the multiplier, raising what the other two put out rather than adding a number of its own: carries 60% of damage amplification across its kit, and takes the front on purpose: this kit feeds on being attacked, and the front is where the attacks are. Pepin is the saboteur, stripping the enemy's stats before the blows land: strips 90% of enemy Might, Resistance and damage in total, and sits in the middle, where the support reaches both the front and the back. Clovis I is the lock: every squad silenced or suppressed is a turn the enemy plan does not happen — Territory Expansion applies Silence on a 60% roll, and stays in the back, out of the enemy's easy reach, and those range-4 skills lose nothing for it. The lineup works because Hellfire produces combat-skill casts, the exact trigger Pepin’s Power of Staff and Clovis I’s Frankish Spear both wait on; Hellfire raises Clovis I’s output directly rather than adding a number of its own. What you give up: raw damage reaches only about 11% of the hardest-hitting trio in the roster; the trigger chain is thin — the three lean on one link rather than several. Budget note: every hero in this lineup can be completed without spending. How these scores work →

    Mid progression 67.44/100 out of 100
  13. 146 Hellfire, front rowRough Rider, middle rowFortuneteller, back row Hellfire · Rough Rider · Fortuneteller
    Hellfire (X09), Rough Rider (S00) and Fortuneteller (X08) score 63.85 out of 100 together, and each of the three has a job.

    Hellfire is the multiplier, raising what the other two put out rather than adding a number of its own: carries 60% of damage amplification across its kit, and takes the front on purpose: this kit feeds on being attacked, and the front is where the attacks are. Rough Rider brings a second damage line worth 30% of the expected output, so no single silence stops the plan: Guerilla Warfae puts 634% into one enemy squad on a 55% roll, and sits in the middle, the deepest row those range-2 skills still fire from. Fortuneteller is the lock: every squad silenced or suppressed is a turn the enemy plan does not happen — Soul Sacrifice applies Suppress, and stays in the back, out of the enemy's easy reach, and those range-5 skills lose nothing for it. The lineup works because Hellfire produces combat-skill casts, the exact trigger Fortuneteller’s Soul Sacrifice waits on; Hellfire raises Fortuneteller’s output directly rather than adding a number of its own. What you give up: Rough Rider (S00) is the era weak point -- the enemy will aim at the oldest squad; raw damage reaches only about 16% of the hardest-hitting trio in the roster. Budget note: every hero in this lineup can be completed without spending. How these scores work →

    Mid progression 63.85/100 out of 100
  14. 150 Hellfire, front rowHeroine of Courage, middle rowClovis I, back row Hellfire · Heroine of Courage · Clovis I
    Hellfire (X09), Heroine of Courage (S00) and Clovis I (X15) score 63.48 out of 100 together, and each of the three has a job.

    Hellfire is the multiplier, raising what the other two put out rather than adding a number of its own: carries 60% of damage amplification across its kit, and takes the front on purpose: this kit feeds on being attacked, and the front is where the attacks are. Heroine of Courage is the second amplifier -- with two heroes raising the output, the carry hits far above its own numbers: carries 29% of damage amplification across its kit, and sits in the middle, where the support reaches both the front and the back. Clovis I is the lock: every squad silenced or suppressed is a turn the enemy plan does not happen — Territory Expansion applies Silence on a 60% roll, and stays in the back, out of the enemy's easy reach, and those range-4 skills lose nothing for it. The lineup works because Hellfire produces combat-skill casts, the exact trigger Clovis I’s Frankish Spear waits on; Hellfire raises Clovis I’s output directly rather than adding a number of its own. What you give up: raw damage reaches only about 12% of the hardest-hitting trio in the roster; Heroine of Courage (S00) is the era weak point -- the enemy will aim at the oldest squad. Budget note: every hero in this lineup can be completed without spending. How these scores work →

    Mid progression 63.48/100 out of 100
  15. 154 Hellfire, front rowFortuneteller, middle rowJade Rakshasa, back row Hellfire · Fortuneteller · Jade Rakshasa
    Hellfire (X09), Fortuneteller (X08) and Jade Rakshasa (S02) score 62.23 out of 100 together, and each of the three has a job.

    Hellfire is the multiplier, raising what the other two put out rather than adding a number of its own: carries 60% of damage amplification across its kit, and takes the front on purpose: this kit feeds on being attacked, and the front is where the attacks are. Fortuneteller is the lock: every squad silenced or suppressed is a turn the enemy plan does not happen — Soul Sacrifice applies Suppress, and sits in the middle, where the support reaches both the front and the back. Jade Rakshasa brings a second damage line worth 33% of the expected output, so no single silence stops the plan: Jade Lotus puts 162% x6 into one enemy squad on a 40% roll, and stays in the back, out of the enemy's easy reach, and those range-5 skills lose nothing for it. The lineup works because Hellfire produces combat-skill casts, the exact trigger Fortuneteller’s Soul Sacrifice waits on; Hellfire raises Fortuneteller’s output directly rather than adding a number of its own. What you give up: Jade Rakshasa (S02) is the era weak point -- the enemy will aim at the oldest squad; the trigger chain is thin — the three lean on one link rather than several. Budget note: every hero in this lineup can be completed without spending. How these scores work →

    Mid progression 62.23/100 out of 100
  16. 162 Hellfire, front rowNorth's Rage, middle rowSoaring Hawk, back row Hellfire · North's Rage · Soaring Hawk
    Hellfire (X09), North's Rage (S00) and Soaring Hawk (S04) score 59.07 out of 100 together, and each of the three has a job.

    Hellfire is the multiplier, raising what the other two put out rather than adding a number of its own: carries 60% of damage amplification across its kit, and takes the front on purpose: this kit feeds on being attacked, and the front is where the attacks are. North's Rage is the lock: every squad silenced or suppressed is a turn the enemy plan does not happen — For the North! applies Suppress on a 30% roll, and sits in the middle, the deepest row those range-2 skills still fire from. Soaring Hawk is the second amplifier -- with two heroes raising the output, the carry hits far above its own numbers: carries 20% of damage amplification across its kit, and stays in the back, where the range-3 skills still touch the enemy front line. The lineup works because Hellfire raises North's Rage’s output directly rather than adding a number of its own. What you give up: no hero here feeds another one's trigger; North's Rage (S00) is the era weak point -- the enemy will aim at the oldest squad. Budget note: every hero in this lineup can be completed without spending. How these scores work →

    Mid progression 59.07/100 out of 100

See the full Footmen rankings →

Best Mixed combos with Hellfire

Hellfire appears in 5 ranked Mixed combos.

  1. 59 Hellfire, front rowPoison Master, middle rowSaladin, back row Hellfire · Poison Master · Saladin
    Hellfire (archer · X09), Poison Master (archer · X10) and Saladin (cavalry · SP · paid) score 73.61 out of 100 together, and each of the three has a job.

    Hellfire is the shield: the damage reduction and staying power buy the rounds the plan needs — carries 63% of damage reduction across its kit, and takes the front on purpose: this kit feeds on being attacked, and the front is where the attacks are. Poison Master is the lock: every squad silenced or suppressed is a turn the enemy plan does not happen — Deadly Virus applies Suppress on a 50% roll, and sits in the middle, where the support reaches both the front and the back. Saladin is the saboteur, stripping the enemy's stats before the blows land: strips 75% of enemy Might, Resistance and damage in total, and stays in the back, where the range-3 skills still touch the enemy front line. The lineup works because Saladin’s Whirlwind Slash produces trigger-rate boosts, the exact trigger Hellfire and Poison Master both wait on; Hellfire produces combat-skill casts, the exact trigger Poison Master’s Spreading Poison waits on; Poison Master’s Deadly Virus applies Suppress and takes a squad out of the fight, so Saladin swings into a line that cannot answer. What you give up: raw damage reaches only about 5% of the hardest-hitting trio in the roster; a mid-era lineup anchored by Saladin (SP). How these scores work →

    Current meta 73.61/100 out of 100
  2. 94 Hellfire, front rowCyrus, middle rowHector, back row Hellfire · Cyrus · Hector
    Hellfire (archer · X09), Cyrus (cavalry · SP · paid) and Hector (archer · X15 · paid) score 69.88 out of 100 together, and each of the three has a job.

    Hellfire is the shield: the damage reduction and staying power buy the rounds the plan needs — carries 63% of damage reduction across its kit, and takes the front on purpose: this kit feeds on being attacked, and the front is where the attacks are. Cyrus is the multiplier, raising what the other two put out rather than adding a number of its own: carries 54% of damage amplification across its kit, and sits in the middle, where the support reaches both the front and the back. Hector is the lifeline: that healing decides whether this lineup is still standing in round five — carries 400% of recovery across its kit, and stays in the back, out of the enemy's easy reach, and those range-5 skills lose nothing for it. The lineup works because Cyrus’s Tolerance produces trigger-rate boosts, the exact trigger Hellfire and Hector both wait on; Hellfire produces combat-skill casts, the exact trigger Cyrus’s Strategy to Victory waits on; Cyrus shuts off enemy recovery, so what Hector deals stays dealt. What you give up: raw damage reaches only about 15% of the hardest-hitting trio in the roster; damage is spread across the enemy line rather than focused on one squad. How these scores work →

    Current meta 69.88/100 out of 100
  3. 98 Hellfire, front rowCyrus, middle rowEselfred, back row Hellfire · Cyrus · Eselfred
    Hellfire (archer · X09), Cyrus (cavalry · SP · paid) and Eselfred (archer · X14) score 69.66 out of 100 together, and each of the three has a job.

    Hellfire is the shield: the damage reduction and staying power buy the rounds the plan needs — carries 63% of damage reduction across its kit, and takes the front on purpose: this kit feeds on being attacked, and the front is where the attacks are. Cyrus is the multiplier, raising what the other two put out rather than adding a number of its own: carries 54% of damage amplification across its kit, and sits in the middle, where the support reaches both the front and the back. Eselfred is the win condition, bringing 71% of the lineup's expected damage: Lady of the Mercians puts 522% into one enemy squad on a 65% roll, and stays in the back, out of the enemy's easy reach, and those range-4 skills lose nothing for it. The lineup works because Cyrus’s Tolerance produces trigger-rate boosts, the exact trigger Hellfire and Eselfred both wait on; Cyrus’s Tolerance produces tempo, the exact trigger Eselfred’s Fortified Line of Attack waits on; Hellfire produces combat-skill casts, the exact trigger Cyrus’s Strategy to Victory waits on. What you give up: raw damage reaches only about 16% of the hardest-hitting trio in the roster; damage is spread across the enemy line rather than focused on one squad. How these scores work →

    Current meta 69.66/100 out of 100
  4. 124 Hellfire, front rowWarden, middle rowClovis I, back row Hellfire · Warden · Clovis I
    Hellfire (archer · X09), Warden (archer · X06) and Clovis I (footmen · X15) score 72.34 out of 100 together, and each of the three has a job.

    Hellfire is the shield: the damage reduction and staying power buy the rounds the plan needs — carries 63% of damage reduction across its kit, and takes the front on purpose: this kit feeds on being attacked, and the front is where the attacks are. Warden is the second layer of armour -- when the first wall bends, this one is already set: carries 116% of damage reduction across its kit, and sits in the middle, where the support reaches both the front and the back. Clovis I is the lock: every squad silenced or suppressed is a turn the enemy plan does not happen — Territory Expansion applies Silence on a 60% roll, and stays in the back, out of the enemy's easy reach, and those range-4 skills lose nothing for it. The lineup works because Warden’s Aspect of the Eagle produces trigger-rate boosts, the exact trigger Hellfire and Clovis I both wait on; Hellfire produces combat-skill casts, the exact trigger Clovis I’s Frankish Spear waits on; Hellfire raises Clovis I’s output directly rather than adding a number of its own. What you give up: raw damage reaches only about 7% of the hardest-hitting trio in the roster; Warden (X06) is the era weak point -- the enemy will aim at the oldest squad. Budget note: every hero in this lineup can be completed without spending. How these scores work →

    Mid progression 72.34/100 out of 100
  5. 125 Hellfire, front rowWarden, middle rowRainforest, back row Hellfire · Warden · Rainforest
    Hellfire (archer · X09), Warden (archer · X06) and Rainforest (cavalry · X08) score 72.15 out of 100 together, and each of the three has a job.

    Hellfire is the shield: the damage reduction and staying power buy the rounds the plan needs — carries 63% of damage reduction across its kit, and takes the front on purpose: this kit feeds on being attacked, and the front is where the attacks are. Warden is the second layer of armour -- when the first wall bends, this one is already set: carries 116% of damage reduction across its kit, and sits in the middle, where the support reaches both the front and the back. Rainforest is the lock: every squad silenced or suppressed is a turn the enemy plan does not happen — Absolute Suppress applies Suppress on a 50% roll, and stays in the back, out of the enemy's easy reach, and those range-5 skills lose nothing for it. The lineup works because Warden’s Aspect of the Eagle produces trigger-rate boosts, the exact trigger Hellfire and Rainforest both wait on; Warden’s Aspect of the Tiger produces extra basic attacks, the exact trigger Rainforest waits on; Hellfire raises Rainforest’s output directly rather than adding a number of its own. What you give up: raw damage reaches only about 6% of the hardest-hitting trio in the roster; Warden (X06) is the era weak point -- the enemy will aim at the oldest squad. Budget note: every hero in this lineup can be completed without spending. How these scores work →

    Mid progression 72.15/100 out of 100

See the full Mixed rankings →

Hellfire — skills

All 8 recorded skills for Hellfire, straight from the hero's game card.

1

Dictator

Leadership Skill · Hero's Squad

The soldier amount cap of the hero's squad is increased by 23,100.

2

Blood Pact

Pre-Battle Skill · Range 5 · Any

Different effects: Footmen: Damage received by your squad -35% . Cavalry: When two random enemy squads launch combat skills and common attacks, the damage dealt by the squad is reduced by -8% and the effect can be stacked up to 8 layers. Archers: In the first three rounds, when your squad takes Damage, there is a 65% Evasion Chance.

3

Defensive Formation

Leadership Skill · Hero's Squad

Hero's squad has +50% Resistance.

4

Offensive Formation

Leadership Skill · Hero's Squad

Hero's squad has +50% Might.

5

Heroic Inspiration

Combat Skill · Range 2 · Any

50% chance to Recover the team with the lowest value of our troops ( Recovery Rate 270% ), and Remove debuff state of two random teams on our side (Cannot remove pre-battle debuffs).

6

Awaken

Leadership Skill · Hero's Squad

Hero's squad gains 15% Might and Resistance, 15% HP, and 250% bonus to the skill "Dictator".

7

Defend

Leadership Skill · Hero's Legion

Hero's formation has +40% Resistance.

8

Rising from Ashes

Pre-Battle Skill · Range 2 · Any

All Friendly Squads Unit Countering -10% . Starting from the 4th round, the damage dealt by our other two squads is +40% .

Which Hellfire combos can YOU play?

Select the heroes you own in the free combo generator and instantly see every Hellfire lineup you can field — plus the best heroes to unlock next.

Open the combo generator